|
A clipping path is a path created in Photoshop® that lets you isolate a foreground object and make everything outside the object transparent when the image is printed or placed into another application. A very common use for clipping paths is when you want to place an image over a background or other element in your page-layout program. As is, any image (besides one in Photoshop®'s "bitmap" mode) placed on a transparent background in Photoshop® will always import into another program with a white box surrounding it. Creating a clipping path will tell your page-layout program to exclude from view (and print) anything outside the path.
Here's how you make one:
|
|
1. In Photoshop, open your image.
|
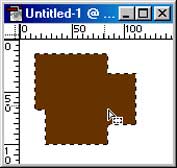 2. If the background that you want excluded is a solid color, it might be easiest to use the magic wand to select that background then invert the selection [Select>Invert] so that the image data you want included is selected. Use whatever techniques you want, but in the end, it's the image data you want included in the final that should be selected. (The brown shape in the sample)
|
 3. With the selection active, go to the Paths Palette. Off the side menu, choose "Make Work Path." This will turn your selection into a bezier-curve path. The tolerance value will determine how closely the path is drawn to your selection. The higher the tolerance value, the fewer anchor points there will be. The default usually works just fine.
|
 4. Now that you have a bezier-path drawn around your object, zoom in to at least 100% and adjust the path as necessary using the Direct Selection tool (in the pen tool grouping) to move points around. Use the Pen + and - tools to add or delete points. Remember that everything inside the path will end up in your final image, and everything outside the path will be excluded.
|
 5. When you're done tweaking the path, double click on it in the paths palette and give it a name.
|
 6. Off the paths palette menu, then choose "Clipping Path" and choose the name of the path you just named. The lower the flatness value, the more accurate your clipping path will be. However, some printers choke with very low flatness values. For high-res printing (1200 to 2400 dpi -- like at an imagesetter), a flatness of 8 to 10 is recommended. For printing to 300 and 600 dpi laser printers, use a flatness value between 1 and 3.
|
|
7. You can then save the file as either EPS or TIFF. These are the only two formats that support the clipping path, but which you choose depends on where you'll be using the image. For placing in PageMaker, I use TIFF because PM will actually display and print the image clipped on screen, whereas EPS will not. However, I don't think Quark will display the clipping path either way. Keep in mind that if you use EPS and are printing to a non-postscript printer, the image will not print with the clipping path, either.
|